⏰ Set an end datetime/end timer for a pre-order
This guide will help you set an end datetime or end countdown timer to a pre-order.
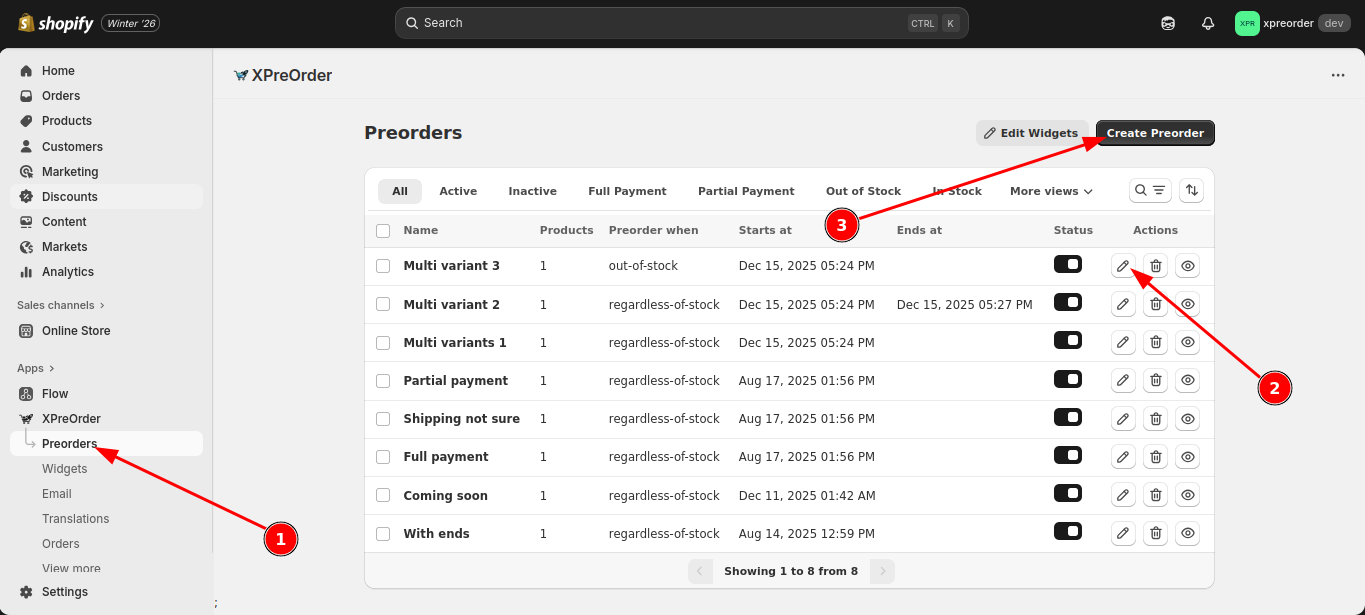
📋 Step 1: Open pre-order you want to add end datetime or end timer
- Open XPreOrder app and navigate to Preorders page.
- Click on the pencil icon of the pre-order you want to configure with an end datetime or end timer.
- Alternatively, if you don't have any pre-order yet, click the Create Preorder button.
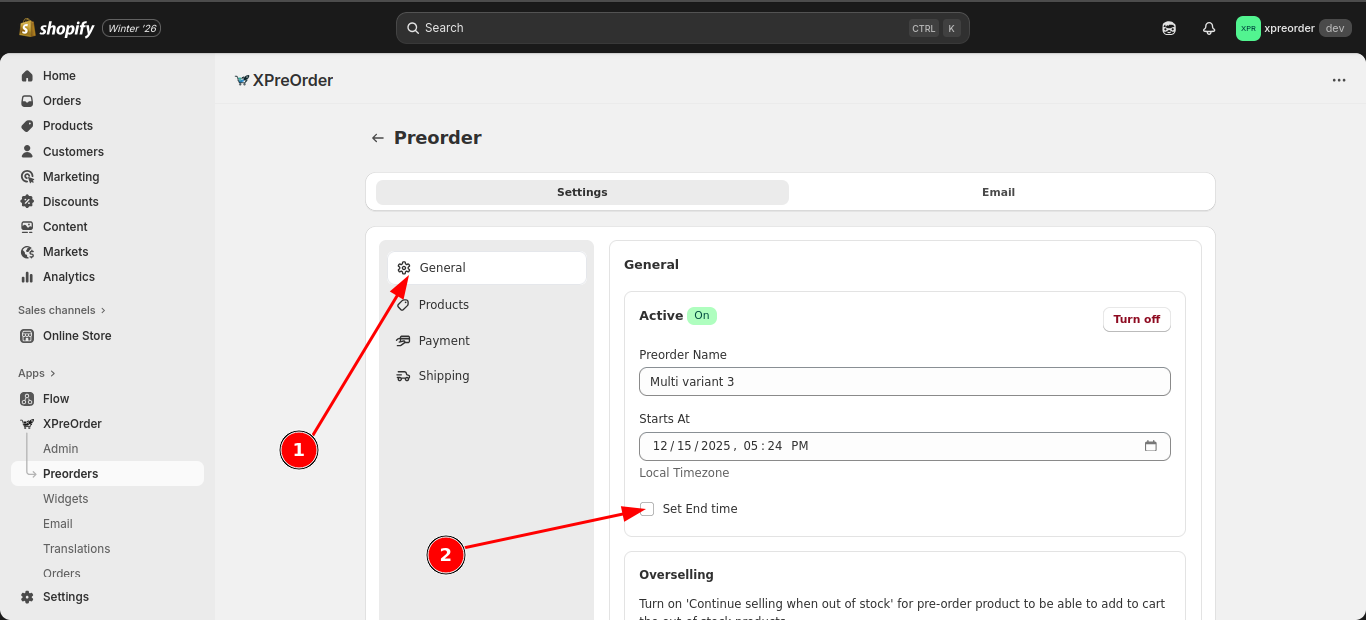
⏰ Step 2: Enable end datetime
- Navigate to the General menu (if you are not already there).
- Check the Set End time option.
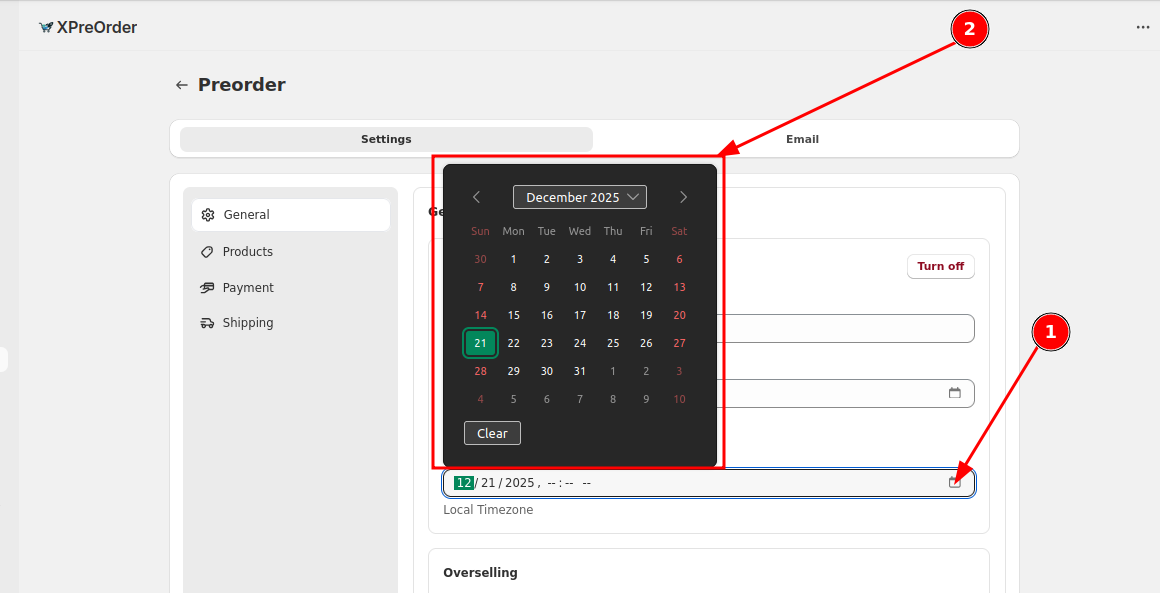
📅 Step 3: Set an end date
- Click on the Calendar icon in the datetime input field.
- A date picker will appear. Select your desired date from the picker.
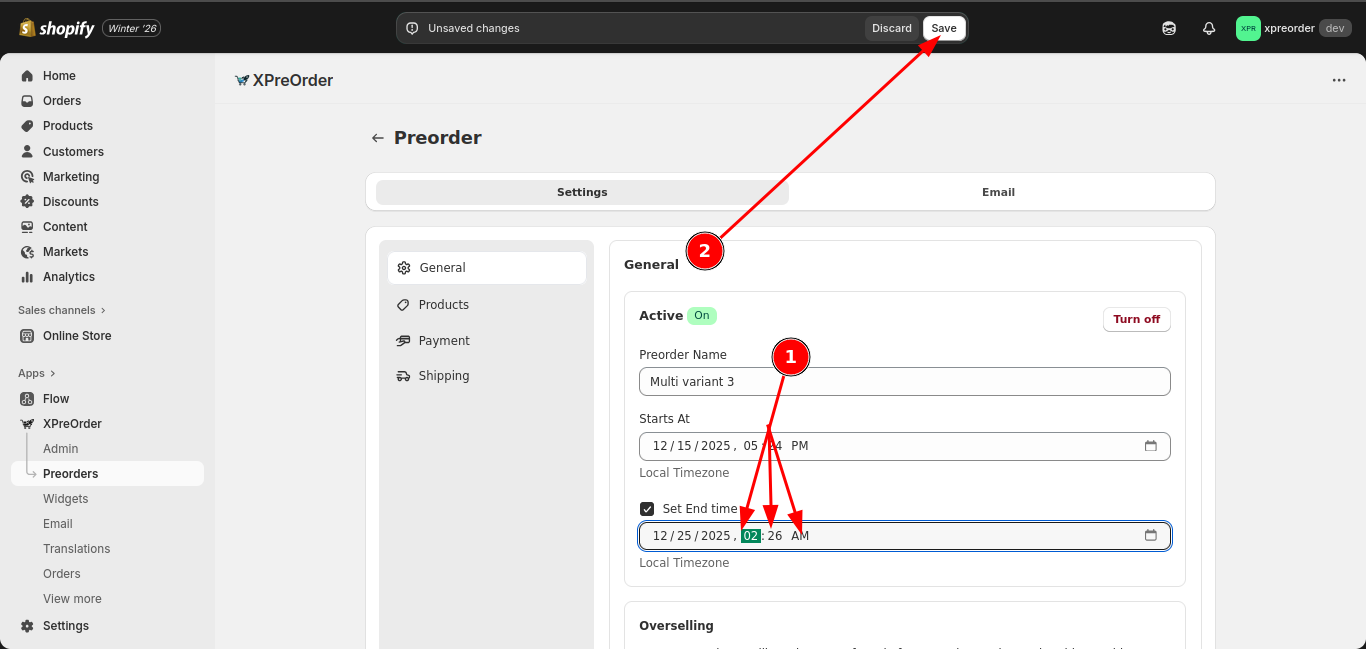
🕐 Step 4: Set an end time
- After selecting the date, click on the colon signs (--:-- --) next to the date to input a time manually using your keyboard or the arrow buttons.
- Click Save to save your changes.
Note: The datetime field will not be saved unless you set both date and time.
⏲️ Step 5: Enable countdown widget
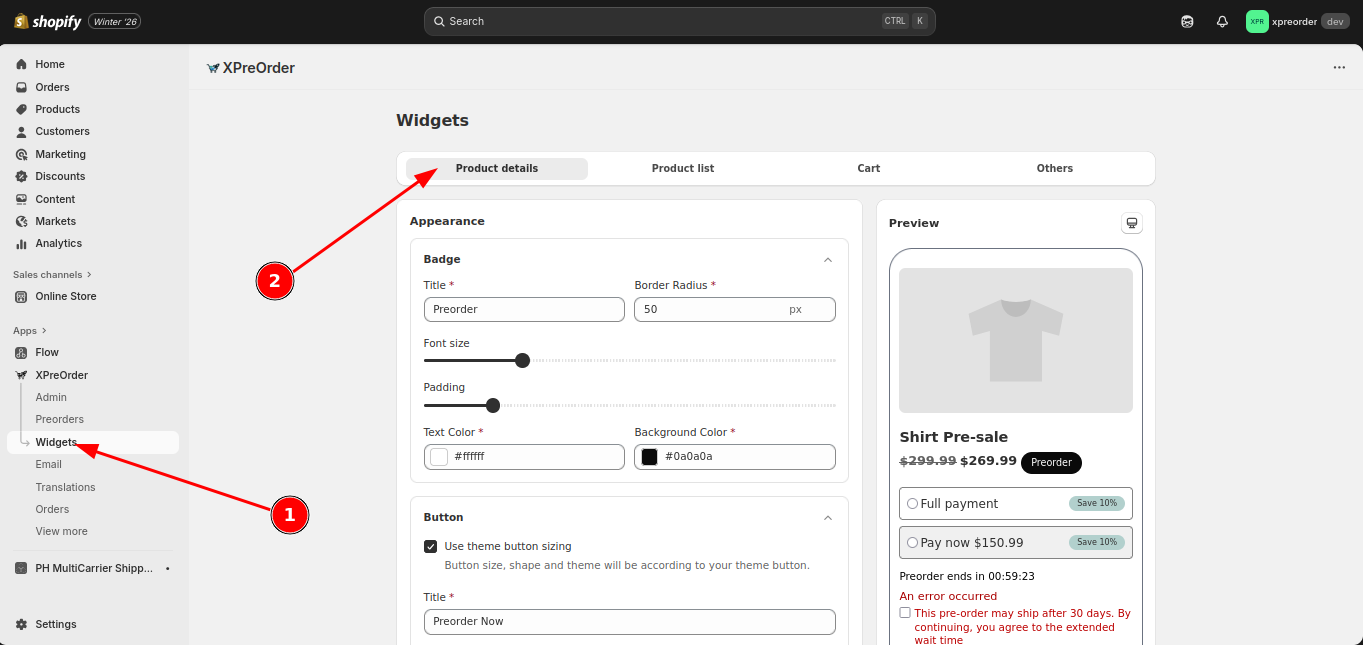
- Navigate to the Widgets page.
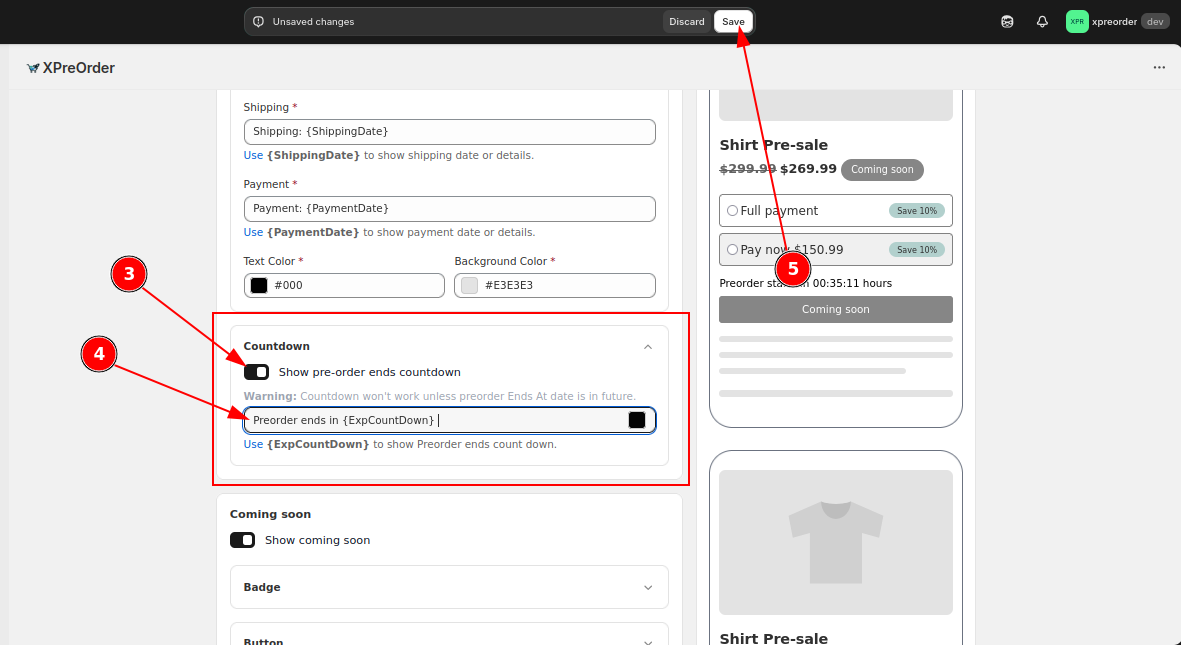
- Ensure you are on the Product details tab and scroll down until you see the Countdown subsection under the Appearance section.
- Ensure the Countdown feature is enabled.
- You can modify the countdown text according to your needs. Use {ExpCountDown} to display the countdown.
- If you made any changes, click Save to save your modifications.
🔥 Done!
You have successfully enabled end datetime and end countdown for your pre-order.
📌 Need Help?
Do you have any difficulties during the process or you have other questions? Contact us through app's Contact Us page or email us at [email protected].